
CREDITS:
This is basic and ready for you to use and even customize !
Some info about how it works?! Somebody /startrace, and then, for the next 20seconds (by def), people can join it and race.
It loads all the saved tracks to check if everything is alright, then free the table so we don't unnecessary keep a lot of data in the memory. So, we load it only when we need it.
(didn't start the script with this idea though, so IF -big if- there are some bugs, I'm pretty sure it is because of the few changes I did to the 'mechanism')
The racing track is using checkpoints, together with 2 markers on radar: 1 for the next cp, 1 for the second next cp.
You can join as many racers as you want in a race, but I've limited it to const race_max_spots = 20;
(so, just change that if you want more)
There is a likes variable too, saved in the database, but never used. I consider it needs to be a lil' bit more hardcoded
in each server, as you need to know who voted already, when players have some time for voting, etc
For more, check it out!
My Racing System is something everybody can use in their servers, as a side activity.
I also suggest you to use some GUI on it
Available commands:
Developer mode:
Download
Some things/functions you might already have
[noae]
[noae]
Some a lil' bit more custom, but still
thought, you might want to edit them
[noae]
Setup
1.First, we must load the RacingSystem.nut
then, for the future, we gonna check if tracks data is good
[noae]
2.Then we make sure we rage quit the players when needed
[noae]
3.Now, onPlayerCommand
[noae]
4.Finally, the magic function
[noae]
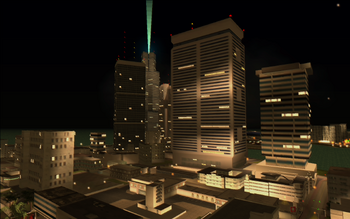
Racing System
(with checkpoints)
This is basic and ready for you to use and even customize !
Some info about how it works?! Somebody /startrace, and then, for the next 20seconds (by def), people can join it and race.
It loads all the saved tracks to check if everything is alright, then free the table so we don't unnecessary keep a lot of data in the memory. So, we load it only when we need it.
(didn't start the script with this idea though, so IF -big if- there are some bugs, I'm pretty sure it is because of the few changes I did to the 'mechanism')
The racing track is using checkpoints, together with 2 markers on radar: 1 for the next cp, 1 for the second next cp.
You can join as many racers as you want in a race, but I've limited it to const race_max_spots = 20;
(so, just change that if you want more)
There is a likes variable too, saved in the database, but never used. I consider it needs to be a lil' bit more hardcoded
in each server, as you need to know who voted already, when players have some time for voting, etc
For more, check it out!
My Racing System is something everybody can use in their servers, as a side activity.
I also suggest you to use some GUI on it
Available commands:
- /race - info and list of cmds
- /startrace //<trackID> <newVehModel> <newLaps> - all params are optional!
- /joinrace
- /quitrace
- /flip
- /lastcp
Developer mode:
- /racedev - toggle developer mode
- /createtrack <name> //<laps> - name must be 1-word
- /createcp - creates the next checkpoint position
Download
Some things/functions you might already have
[noae]
Code Select
const COLOR_BLUE = "[#4baaff]";
const COLOR_GREY = "[#b0b0b0]";
const COLOR_WHITE = "[#ffffff]";
[/noae][noae]
Code Select
function random( min, max )
{
        if ( min < max )
                return rand() % (max - min + 1) + min.tointeger();
        else if ( min > max )
                return rand() % (min - max + 1) + max.tointeger();
        else if ( min == max )
                return min.tointeger();
}

function GetTok(string, separator, n, ...)
{
    local m = vargv.len() > 0 ? vargv[0] : n,
    tokenized = split(string, separator),
    text = "";
    if (n > tokenized.len() || n < 1) return null;
    for (; n <= m; n++)
    {
        text += text == "" ? tokenized[n-1] : separator + tokenized[n-1];
    }
    return text;
}

function NumTok( string, separator )
{
    local tokenized = split(string, separator);
    return tokenized.len();
}
[/noae]Some a lil' bit more custom, but still
thought, you might want to edit them
[noae]
Code Select
function devprint( text )
{
	MSG( COLOR_GREY + text + "" );
	print( text );
}

function pMSG( text, player )
{
	return MessagePlayer( COLOR_BLUE + text, player );
}

function MSG( text )
{
	return Message( COLOR_BLUE + text );
}

function SQLC( db, column )
{
    return GetSQLColumnData( db, column );
}
[/noae]Setup
1.First, we must load the RacingSystem.nut
then, for the future, we gonna check if tracks data is good
[noae]
Code Select
function onScriptLoad()
{
	dofile( "scripts/RacingSystem.nut" );
	CheckTracksData();
}
[/noae]2.Then we make sure we rage quit the players when needed
[noae]
Code Select
function onPlayerPart( player, reason )
{
	if( racedev == player.ID ) racedev = null;
	QuitTrack( player );
}
function onPlayerDeath( player, reason )
{
	QuitTrack( player );
}

function onPlayerKill( player, killer, reason, bodypart )
{
	QuitTrack( player );
}

function onPlayerTeamKill( player, killer, reason, bodypart )
{
	QuitTrack( player );
}
[/noae]3.Now, onPlayerCommand
[noae]
Code Select
else if ( cmd == "race" )
		{
			pMSG( "Racing System by Sebastian (aka sseebbyy)", player );
			pMSG( "Commands: (/) racedev, startrace, joinrace, quitrace, flip, lastcp", player );
		}

		else if( cmd == "startrace" )
		{
			if( !text ) return AnnounceRace();

			local param = array( NumTok( text, " " ) );

			local i = 0;
			for( i = 0; i < param.len(); i++ ) param[i] = GetTok( text, " ", i+1 );

			if( ( param.len() == 1 ) && IsNum( param[0] ) ) return AnnounceRace( param[0] );
			else if( ( param.len() == 2 ) && IsNum( param[1] ) ) return AnnounceRace( param[0], param[1] );
			else if( ( param.len() == 3 ) && IsNum( param[2] ) ) return AnnounceRace( param[0], param[1], param[2] );
			else return pMSG( COLO_GREY + "Error - One/more params are not numbers. Every parameter must be number.", player );
		}

		else if( cmd == "joinrace" )
		{
			JoinTrack( player );
		}

		else if ( cmd == "quitrace" )
		{
			QuitTrack( player );
		}

		else if ( cmd == "flip" )
		{
			local veh = player.Vehicle;
            if ( !veh ) pMSG( COLOR_GREY + "You need to be in a vehicle to use this command.", player );
            else
			{
				local rot = veh.Rotation;
                veh.Rotation = Quaternion( 0.0, 0.0, veh.z, veh.w ); // by Xmair
                pMSG( COLOR_BLUE + "Vehicle flipped.", player);
            }
		}

		else if ( cmd == "lastcp" )
		{
			LastCP( player );
		}

		else if( cmd == "racedev" )
		{
			if( racedev == player.ID ) return devExit( player );
			else if( racedev == null ) return devEnter( player );
		}

		else if( cmd == "createtrack" )
		{
			if( racedev == null ) return pMSG( COLOR_GREY + "Error - You must be in the developer mode!", player );
			else if( racedev != player.ID ) return pMSG( COLOR_GREY + "Error - You must be in the developer mode!", player );
			else if( !text ) return pMSG( COLOR_GREY + "Error - Correct Syntax: /" + cmd + " <name> <laps?>", player );

			local 	track,
					name = GetTok( text, " ", 1 );

			if( NumTok( text, " " ) != 2 )
			{
				track = CreateTrack( name, player );
				if( track )
				{
					Race.ID = track.ID;
					pMSG( COLOR_BLUE + "[RACEDEV] " + player.Name + " created a new racetrack " + name, player );
				}
				return;
			}

			local laps = GetTok( text, " ", 2 );
			if( ( laps != null ) && !IsNum( laps ) ) return pMSG( COLOR_GREY + "Error - Second parameter '<laps>' must be a number!", player );

			track = CreateTrack( name, player, laps.tointeger() );
			if( track )
			{
				Race.ID = track.ID;
				pMSG( COLOR_BLUE + "[RACEDEV] " + player.Name + " created a new racetrack " + name + " with " + laps + " laps.", player );
			}
		}

		else if( cmd == "createcp" )
		{
			if( racedev == null ) return pMSG( COLOR_GREY + "Error - You must be in the developer mode!", player );
			else if( racedev != player.ID ) return pMSG( COLOR_GREY + "Error - You must be in the developer mode!", player );

			local tid = Race.ID;
			if( tid == null ) return pMSG( "Unfortunately, there is no race announced yet.", player );

			local track = trackTable.rawget( tid );
			CreateCP( tid, player.Pos );
			pMSG( COLOR_BLUE + "[RACEDEV] " + track.Name + " got a new checkpoint by " + player.Name, player );
		}
[/noae]4.Finally, the magic function
[noae]
Code Select
function onCheckpointEntered( player, checkpoint )
{
	if( Race.ID != null && trackTable.rawin( Race.ID ) )
	{
		local 	tid = Race.ID,
				track = trackTable.rawget( tid );

		if( track.pptTable.rawin( player.ID ) )
		{
			local ppt = track.pptTable.rawget( player.ID );
			if( ppt.UCP.ID != checkpoint.ID ) return 0;

			ReachCP( player );
		}
	}
}
[/noae]


 [/spoiler]


 via onKeyDown( player, key )

